Showing posts with label Sweets / Desserts. Show all posts

Carrot hawla

Gajar ka halwa or carrot halwa is a  very nutritious and tasty Indian sweet dish. It is a very simple process; nothing can actually go wrong here. By using evaporated or half-half, cooking time will be drastically reduced.
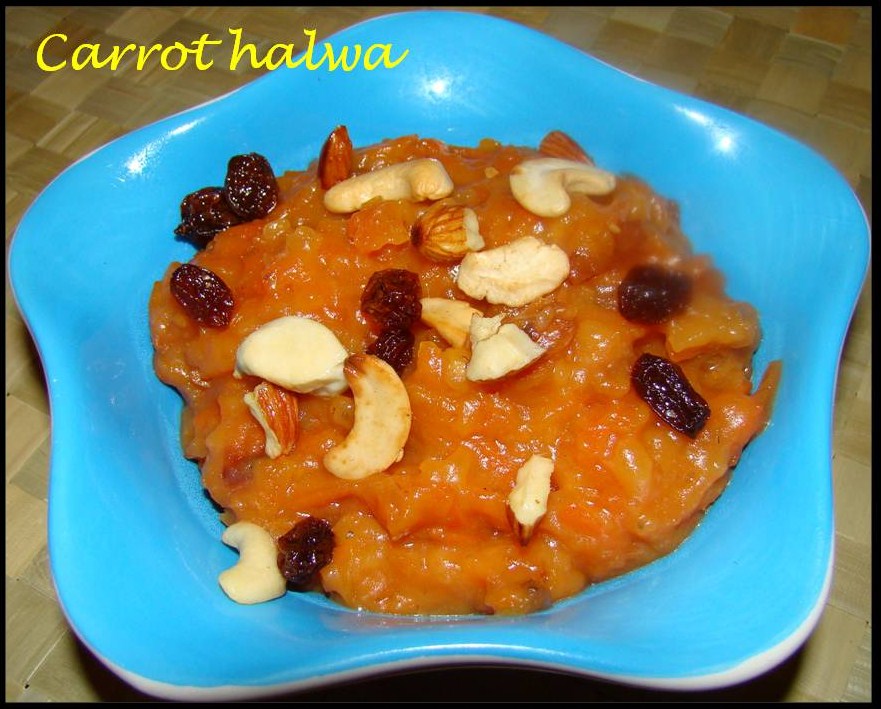
1 lb Carrots
1 can Evaporated Milk or 1 cup Half-half
1½ cups Sugar
4 tsp Ghee
½ tsp Elachi powder
2 tsp Raisins
2 tsp Almonds
2 tsp Pistachios
2 tsp Cashew nuts
Few strands of saffron
1 tsp Rice flour

Wash and peel carrots. Finely grate them, keep aside.

In a large non stick pan take 3 tsp of ghee, when warm add all nuts and then raisins, fry them till golden yellow. Remove the nuts and raisins from the ghee to a bowl. Keep aside. To the remaining ghee add another tsp of ghee and add the grated carrots, fry till the raw color changes. Then add a can of evaporated milk or cup of half-half and cook for a few minutes.
Now add sugar, elachi powder and 1” butter or ghee. Cook on medium heat and keep stirring regularly. When it all comes close together add a tsp of rice flour. Rice flour acts as a binding agent and brings all the ingredients together. Add all the friend nuts and mix well or arrange on the top. And garnish with saffron.

Grease the serving bowl and transfer the contents into it.

Carrot halwa can be served warm or cold, it’s a personal choice. Enjoy it with fresh whipped cream or vanilla ice cream for variation. I have see people enjoying hot jelabi with carrot hawla and if you are like someone I know, warm halwa with roti for dinner!

Cashewnut chikki

Srirama Navami Subhakanshalu (03/24/2010)

Chikki is a traditional Indian sweet prepared with any edible nuts or with mixed nuts and sugar/jaggery. The preparation is quite simple. These are finger deserts that are hassle free and easy to eat!

Cashew nuts, like all nuts, are an excellent source of protein and fiber. They are rich in mono-unsaturated fat which may help protect the heart. Cashew nuts are also a good source of potassium, B vitamins and folate. They contain useful amounts of magnesium, phosphorous, selenium and copper. (source: Wiki)

I have to mention here the chikki made in Lonavala, Pune. They are simply mouth watering and will leave us craving for more! One piece is never quite satisfying. I love their pistachio, mixed nuts chikki.

Traditional chikki are made with peanuts but, I am a cashew person, so..

1 cup - Roasted cashewnuts (sliced or whole)
1 ¼ cup - Jaggery
2 tsp Ghee

Roast the nuts on low flame in ghee and in the case of peanuts remove the skin.

Take grated jaggery in a kadai and add ¼ cup water and on medium flame bring to a boil till it thickens. Perform the ball test, drop some syrup drops in cold water and try to roll it to form a ball if it is like a string, it needs to be cooked a bit more.

Filter the jaggery syrup to remove any impurities. (Avoid if you trust the jaggery). I buy mine at the same store always!

Once the syrup is ready, add a tsp of ghee to the syrup switch off the flame and immediately add the roasted cashew nuts. Stir and mix well.

Grease a parchment paper and pour the hot mixture on it. Roll it with a rolling pin and let the temperature of the mixture come down. Lumps of mixture can be rolled into a ball in the palm of your hand or cut into any desired shape.

Store in an air tight box, they have a good shelf life.

Mysore pak

Mysore pak is a traditional South Indian sweet. There are different variations to it. Authentic Andhra mysore pak is hard and grainy, it has a double color to it. Mysore pak in Chennai is soft and dripping with ghee (cannot beat Sri Krishna’s mysore pak). This particular mysore pak is very easy. Check for the sugar syrup consistency and work on low flame for better results. A finger desert that easy to store and eat. Has a good shelf life, so prepare ahead during festivals or parties.
1 cup Bengal Gram - Senagapindi
2 cups Sugar
1 cup Ghee (Pure ghee can be used or oil can also be added.)
½ cup Oil
½ cup Water

Take 1 tsp of ghee in a non stick pan and add the flour. Fry on low flame till nicely done and color changes along with aroma of fried flour. Remove from flame let cool and sieve the flour to remove any lumps. This will make the flour aerated.

Melt ghee in a vessel and leave it on low flame till it is used.

Take sugar in a non-stick pan and add water and bring to a boil. Keep stirring and check the consistency. In few minutes drop a bit of the sugar syrup in the bowl of cold. The syrup should instantly settle at the bottom and when moved with a finger should form a round lump inside the water. The consistency of the sugar solution is very important in mysore pak preparation.

Reduce the heat and then, slowly add the flour stirring continuously so that no lumps are formed. Mix well till the flour blends well in the syrup. Now, add hot ghee with a ladle, one scoop at a time stirring evenly and continuously. Ghee will be absorbed by the base, it becomes frothy and bubbles are formed. Keep stirring till ghee separates and immediately transfer on to a greased tray and pat it well to even out. Let settle down and cut into diamond or desired shape. Allow it to cool and separate the pieces.

Do not wait too long to cut, or it will be very difficult to cut into a perfect shape. Store in an air tight box. Warm a few seconds (8 to 10 seconds) before serving.

Boorelu


Traditional Andhra sweet, a must for special occasions and festivals. There are two kinds of boorelu, one with pesarappu filling and the other with senagapappu filling. Pesarappu and sugar go well and senagappu and jaggery go well. The second is basically Bobbatullu - Puranpoli filling.
Pesarappu filling is a very light and tastes well. The procedure looks lengthy but, there is nothing that can actually go wrong with this method. So have fun preparing and enjoy!
For the filling:
2 cups Moonga dal - Pesarappu
1 cup freshly grated Coconut
1 tsp Elachi powder
2 cups Sugar

For the covering:
1 cup Minnappu - Urad dal
1/4 cup Raw Rice

For people trying it for the first time, I would advice you have more of the covering batter just in case. Mix minnappu and rice and soak in water for 2 hrs. Drain and grind to a smooth paste using as less water as possible. Keep aside.

Soak pesarappu for 1 hr in water. Grind to smooth batter using less water. Pour the batter in the idli stand trays (like idli) and steam cook for 15 minutes on high and 5 minutes on low flame. Remove the batter idli's and let cool for 5 minutes.

Grate coconut and keep aside. Measure sugar keep aside. Have the elachi powder ready.

I have tried and tested other methods, but by following this method, you will have fluffy stuffing inside.

Depending on the quantity you are making, divide the idlis and sugar in equal ratio. In a mixer jar add one quantity of idli's (say 4) and add one ratio of sugar and dry grind briskly till the idli and sugar mix well, repeat the process for all, transfer into a bowl. The consistency of the filling will be same. Then add grated coconut and elaci powder to the bowl and mix thoroughly.

Make medium sized balls using wet palms, press hard inot a tight ball so that they do not fall apart. Make all the balls ready before you start frying.

Now, rice and urad dal can be made into a semi thick batter (to the consistency of bajji batter). Do not use too much water. Empty into a wide bowl and add water if the batter is too thick.

Take a low bottom kadai and add oil to it. When oil is hot enough drop about 7 - 8 dal balls into the batter (enough for 1 batch) roll the ball in the urad/rice batter
and drop it gently into the oil. Repeat the process for all in the batch. Do not disturb them immediately. After 2 -3 minutes move them gently. Sometimes they attach to each other like a cluster, do not try to remove them, they will get fried in spite of sticking to each other.

Turn them on the other side and fry till they are golden yellow. Remove them and place them on a paper towel for the excess oil to be absorbed.

Follow the same procedure for all of them. If you have the covering batter left over, it can be made into dosa, rotti or add onions and fry them like fritters.

Serve them warm. If you would like to eat it traditionally, make a hole in it with your litter finger, add warm ghee and enjoy!

Store them in the refrigerator for up to 4 days.
File picture from a long time...

Sunnundalu - Sweet Balls

A very easy and fast sweet, that will make you crave for more! We basically grew up eating these, they would mark each special occasion. My grandmother used to make these every year with out fail for my birthday, they have a special place in my heart for ever. I would suggest sweet sweet lovers to give it a try, its all worth it.
2 cups Urad dal - Minnapappu
2 cups finely grated Jaggery
1 cup melted Ghee
1/2 tsp Elachi powder
Cashew nuts
Raisins
Almonds - Optional

Soak Almonds in warm water for 5 – 6 hrs and remove the peel and cut into slices.
Take 2 tsp of ghee in a skillet and fry cashew nuts, almonds and raisins till they are nicely done. Remove from the skillet into a glass bowl.

Dry fry urad dal on medium heat till nicely roasted and remove from flame. Let cool and make a smooth powder using a mixee. Add elachi powder to the urad dal powder.

Grate jaggery very finely without any lumps. Melt ghee in a bowl of warm water to a clear liquid. Make sure ghee is slightly warm when mixing with the powder, it binds well then.

Transfer the urad dal powder into the glass bowl, add grated jaggery and fried nuts and mix well using your hands. Then add ghee slowly in small quantities mixing the mixture mixing using the palm of the hand and making into a round ball pressing tight.

If the mixture is taking the form of a ball, it has enough ghee, else add some more ghee. Stop when you are able to form a ball. Using both your hands tighten the ball with hands so that it will not fall apart.

Grease your hands with ghee and press in between hands while transferring them one by one into an air tight box. Store at room temperature. It has good shelf life.

Nuts and raisins are optional. A dry treat after a meal. Easy to carry while travelling.

Ariselu


2 cups Rice flour
1.5 cups Grated Jaggery
1 tsp Elachi Powder
3 tsp Ghee
Oil to fry
Wash rice thoroughly and soak overnight. For better quality, rice can be soaked for a 2nd day also. In that case, change water after 8 hrs.

Drain water and spread rice on a cloth for a half hour, make sure that the rice is not dripping wet.

Make fine flour in a mixee and sieve to make sure no grains are left behind and set aside. The flour should be slightly damp.

Add half cup of water to grated jaggery and bring to boil in a skillet. Initially it will be foamy, but will settle as it is stirred. To check if done, add a few drops to cold water in a plate and if it can be rolled over or made into a ball, it has reached the right consistency. Filter syrup to remove any unwanted particles from jaggery (avoid if using clear jaggery).

Turn the flame to low and add rice flour to the syrup slowly and stirring well, making sure no lumps are formed. Stir till a dough consistency is reached. Remove from flame and bring to room temperature or when the dough can be handled with hand, make small lime sized balls with it and place them on rice flour to avoid sticking to each other and to the plate.

Pat each ball with fingers into a thin, round and flat circle on aluminum foil and dab it with a few sesame seeds (optional).

Fry in batches in oil on low flame till golden yellow and remove. Squeeze between flat ladles or by using paper towels to drain the excess oil. Add the excess oil back to the frying pan. Ideally there is an Ariselu presser with 2 claws, when each Arise is pressed with it, excess oil drips out immediately. Or squeeze with paper towels.

Repeat the process till the dough is over or store in a Ziploc bag for a quickie for future use.

When cool store them in an air tight container. Ariselu last for more than two weeks.

I do not want to scare anybody potentially who want to try this out. It is a lengthy process, but the end product is rewarding. The key to making good ariselu are 3 things.
1. To make damp rice flour. That is easy when followed the right procedure.
2. To make the right consistency jaggery syrup. Take the test, of dropping in cold water to make sure. Basically "letha pakam" or tender syrup consistency should be reached. This is the key to good ariselu.
3. Last, while frying, fry in low/medium heat and remove when changes color, too much frying will make it very crispy and hard.
So, good luck!


Ariselu - Photo Tutorial

Soak raw rice for 2 days and dry for 1/2 hr in the Sun.
Grind the rice to a smooth flour, add elachi, seive for better quality.
Add grated jaggery to a skillet.
Add a cup of water and bring to a boil.
Add rice flour stirring slowly and cook till it comes together. Bring to room temperature.
Make small balls and place in a plate with rice flour so that they won't stick.
Flatten the round balls on a foil sprayed with PAM or greased with oil.
Fry the flattened circles on medium flame in oil till they turn to golden yellow. Squeeze excess oil between 2 ladles or with a paper towel.
Ariselu are ready. Store in a air tight container for up to 2 weeks at room temperature.

Pineapple Kesari


1 cup Sooji – Bombay Rava
3 cups Pineapple cubes – Fresh/ Canned
1 ¼ cup Sugar
¼ tsp Elachi Powder
¼ cup Ghee
Cashew nuts, Almonds and Raisins
Pinch of Kesar Color

Take 2 tsp of ghee in a non stick pan and when it is hot, add almonds and cashew nuts and fry them, then add raisins. Remove the nuts and raisins, leaving ghee in the pan. Add sooji and fry till it turns golden yellow stirring frequently without burning. Empty the sooji into a plate or onto a paper.

Take 1 tsp of ghee in the skillet and when hot add the cubed pineapple and fry for a few minutes, then take 1: 2 ½ ratio of water to the sooji. (For plain kesari 2 rations of water and ½ ratio of milk can be used.)

Pour water into the pan and bring to boil, add a pinch of kesar color, then simmer the stove and add sooji in small quantity, gently stirring in the water. Be careful not drop the whole thing at once or lumps of sooji will form and it will not be cooked evenly.

Once bubbles appear on the pan top, add sugar, gently stirring in. Add ¼ cup ghee, elachi powder and mix thoroughly. Keep stirring frequently till ghee bubbles appear on the top of the pan. This is a sign that sooji has been cooked well.

Grease a plate or tray with ghee and empty the contents into the tray and even it with a ladle. Garnish with nuts and raisins. Let it settle down for a few minutes and using a butter knife cut into desired shape, squares or diamonds and remove into a storage box. Save in the refrigerator for 4 - 5 days.

Mango is another fruit that can be used to make Mango Kesari.

Annam paravanam - Rice Pudding


1 cup Basmati Rice - any Raw Rice
1.5 cups grated Jaggery
2" Butter stick or Ghee
¼ tsp Elachi powder
4 cups Milk
1 cup half-half : Optional
Cashew nuts, Almonds and Raisins

In a small skillet add 2 tsp of ghee and fry cashew nuts, almonds and raisins till they are nicely roasted.

In a medium sauce pan wash and drain water. Add 2 cups water and cook on low/medium flame mixing well.

When the water and rice starts to boil add milk and cook until the rice becomes soft. Water or milk can be added as needed. Keep mixing so that it will not burn. Add elachi powder and butter stick (or ghee can be added according to taste). Half -half can be added just 2 minutes before removing from the flame, this gives a very rich taste to the dish. Add a pinch of pacha-karpuram (camphor) {Not the regular arati camphor, this is edible}, this gives any sweet dish, temple prasadam taste.

Remove from flame and after 2 minutes add grated jaggery and mix well. Do not cook after adding jaggery, this will break the milk. The heat in the mixture will make the jaggery melt and mix evenly.

Garnish with fried nuts, raisins and serve hot.

Payasam - Kheer


1/2 cup Vermicelli
1/2 cup Sabudana - Sagubiyyam
2 cups Sugar
1/4 th Gallon Milk
1/2 tsp Elachi Powder
Few Saffron flakes
Few Raisins, Cashews and Almonds

Take 2 tsp of ghee in a skillet and fry almonds, cashews and raisins in that order. Remove and place them in a bowl leaving the remaining ghee in the skillet.

Now fry sagubiyyam till they expand and become bigger. Empty into a vessel. Then fry vermicelli till they turn into golden yellow. Remove into the same vessel.

Mix well, add enough water 1 : 1 to the mixture and cook in a pressure cooker or on a stove top till sagubiyyam and vermicelli are soft and cooked.

Empty the cooked items into a low bottom sauce pan add 1/2 cup water and cook on medium flame, then add milk and keep stirring frequently till the milk boils. Add sugar(suite taste), elaci powder, saffron flakes and 2 tsp of ghee and let cook for 4 - 5 minutes and remove from flame.

Garnish with raisins and nuts. Payasam may thicken when it cools, add more milk and heat before serving. Serve warm.

Rava Laddu


2 cups Rava - Sooji
1/2 cup freshly grated Coconut - Optional
2 cups Sugar
5 - 6 tsp Ghee
1/2 tsp Elachi powder
Cashew nuts
Raisins
Less than 1/4 cup Milk

Take 2 tsp of ghee in a skillet and fry cashew nuts and raisins till they are nicely done. Remove from the skillet into a glass bowl.

Add 1 tsp of ghee and fry rava for a few minutes and then add freshly grated coconut till the mixture changes into a nice golden yellow. Add elachi powder.

Transfer the mixture into the glass bowl, add sugar and remaining ghee and mix well. Heat milk in a micro oven (to a boil) and gently sprinkle on the rava, mixing using the palm of the hand and making into a round ball pressing tight. Add milk as required.

Nuts and raisins are optional. Save in the refrigerator in a box to retain freshness.

White Chocolate & Walnut Moulds


1 bag White Chocolate Chips (about 2.5 cups)
2.5 cups chopped Walnuts
2 tsp Butter

Dry fry walnuts in a skillet and let cool.

Take equal ratio of walnuts, white chocolate chips and place them in a glass micro oven able bowl. Mix them and heat in high for 1 min at a time adding butter and stirring frequently.

Repeat this process till the chocolate melts. Be careful not to burn the chocolate.

Take spoon fulls and place on a greased tray (like small moulds) and let cool.

Or

Grease a plate or aluminium tray/foil and pour the mixture on it and spread, use a knife and make a grid of small boxes. By doing this, pieces can be cut into perfect shape. Then break into pieces and serve.

Put this in the refrigerator for 20 minutes till it comes to room temperature.

They have a good shelf life, save in a box.

Cashews can also be used to make this.

Chakra Pongali - Dal & Rice Pudding


1 cup Rice
¼ cup Moong dal - Pesarapappu
1 cup Sugar
2" Butter stick or Ghee
¼ tsp Elachi powder
2 tsp Grated Coconut: Optional
½ cup Milk or Half-half
Cashew nuts, almonds and raisins

In a small skillet add 2 tsp of ghee and fry cashew nuts and raisins till they are nicely roasted. Remove only the nuts and raisins and in the remaining ghee fry moong dal till it is golden yellow in color.

In a medium sauce pan wash and drain water. Add 3 cups water and cook on low/medium flame mixing well.

When the rice starts to boil add dal to it and mix and cook till it becomes soft. Water can be added as required. Add Grated coconut, milk and elachi powder, butter stick or ghee and cook for a few more minutes. More ghee can be added according to taste.

Garnish with fried nuts, raisins and serve hot.

Teepi Garelu

2 cups urad dal
Chili-ginger paste -optional
Oil to fry
1.5 cups sugar
1 tsp elachi powder

Soak urad dal in water for 2 – 3 hours. Drain water and grind to a smooth batter. Add salt to the dal while grinding by adding it later the dough will become soggy and watery. Add as less water as possible while grinding. Solid dough gives a good shape to the garelu.

Make the syrup base before frying the garelu.

Syrup base:

Take 1.5 cups of water and bring to boil in a vessel. Add elachi powder and 1.5 cups of sugar. Bring to boil. Boil in high flame for 5 minutes. Pour the Liquid in a flat bottom dish. This will help all the garillu to absorb the sugar syrup.

For garelu:

Heat oil in a kadai (I personally prefer a traditional concave shape kadai for maximum usage of space with less oil) and never let the oil be screaming hot! It burns the first batch.
Wet hands and take small lemon size dough and place it on a wax paper or Aluminum foil (it can be done in the palm of a wet hand also), flatten it into a nice circle and then make a small hole with a finger in the middle. Gently slide this into oil without disturbing its shape. Let fry for a few seconds and then keep turning back and forth so it will not burn.
Once they all turn golden yellow, it’s time to remove from the oil. Place a bowl of water and drop the fried garillu in the water. Let the water soak them and by doing this the excess oil is also removed. Let them stand in water for 2 – 3 minutes. Remove gently and place them in the sugar syrup already prepared. Let the syrup soak them for 2 – 3 hours. They will nicely bloat by absorbing the syrup.